Chartmuseum Mirror
Since the stable and incubation helm chart repositories are deprecated, charts are published in a multitude of locations. Unfortunately not all these locations are as stable as you would expect them to be. In this post we will setup Chartmuseum on a Kubernetes cluster, backed by AWS S3 and use it and Github Actions to publish our own charts and mirror the repositoreis we need.
Using Pulumi to bootstrap our infrastructure⌗
Pulumi is a tool that allows us to leverage familiar programming languages to define our infrastructure as code. In this post we will be using the Typescript version of Pulumi together with a free account.
Let’s install Pulumi using Homebrew since I use MacOS. You can use Pulumi on any operating system and the installation instructions can be found in the documentation. FYI, a lot of the Pulumi code samples is copied from the Pulumi documentation, the go-to source for anything you want to do with Pulumi.
brew install pulumi
You will also need a free account from the Pulumi website. This account is used to store the state of your infrastructure. You can also use your own backend if you do not feel comfortable using the Pulumi backend, the configuration of this can be found in the docs.
Using this account, you can log in on your computer
pulumi login
In your account settings, under Access Tokens, you need to create a new token. Save the token for the future steps. It looks like this (obviously this is not my token 🤦):
pul-xxxxxxxxxxxxxxxxxxxxxxxxxxxxxxxxxxxxxxxx
This handled, we will create the Pulumi stack for this tutorial.
mkdir chartmuseum-tutorial && cd chartmuseum-tutorial
pulumi new aws-typescript
The Pulumi CLI will ask you some questions to complete the setup
- Enter in a Pulumi project name, and description to detail what this Pulumi program does
- Enter in a name for the Pulumi stack, which is an instance of our Pulumi program, and is used to distinguish amongst different development phases and environments of your work streams.
- Your preferred AWS zone
Setting up the Kubernetes Cluster on EKS⌗
Let’s start off by creating the cluster. First we need to add some more dependencies.
npm install --save @pulumi/eks @pulumi/kubernetes
Open the existing file index.ts, and replace the contents with the following:
import * as pulumi from '@pulumi/pulumi';
import * as aws from '@pulumi/aws';
import * as eks from '@pulumi/eks';
import * as k8s from '@pulumi/kubernetes';
import * as cloudflare from '@pulumi/cloudflare';

const name = 'chartmuseum';

// Create an EKS cluster
const cluster = new eks.Cluster(name, {
  instanceType: 't2.medium',
  desiredCapacity: 1,
  minSize: 1,
  maxSize: 2,
});

// Export the clusters' kubeconfig.
export const kubeconfig = cluster.kubeconfig;
The index.ts occupies the role as the main entrypoint in our Pulumi program. In it, we are going to declare:
- The resources we want in AWS to provision the EKS cluster based on our cluster configuration settings,
- The kubeconfig file to access the cluster, and
- The initialization of a Pulumi Kubernetes provider with the kubeconfig, so that we can deploy Kubernetes resources to the cluster once its ready in the next steps.
You will notice that there is hardly any configuration needed. But this does not mean you cannot tune everything to your harts content. Since we use typescrupt, you can easily find all configuration settings in the type definitions of the ClusterOptions argument.
Before we can deploy this cluster, we still need to configure our AWS credentials, there are many options, choose your poison in the AWS provider documentation.
pulumi config set aws:accessKey AAAAAAAAAAAAAAAAAAAA --secret
pulumi config set aws:secretKey m/ZTX/xxxxxxxxxxxxxxxxxxxxxxxxxxxxxxxxx --secret
By using –secret, the value is encrypted and you can commit it to git. It stores these configuration values in the Pulumi.stackname.yaml file.
We can not deploy the cluster by running
pulumi up
An ingress controller and domainname via Cloudflare⌗
Since we are going to need a domainname pointed tot he chartmuseum instance, we will add a Cloudflare dependency so we can use it to create and manage the domainname. Pulumi supports a lot of DNS providers, as stated before, check the docs for other setups.
npm install --save @pulumi/cloudflare
In this case, I’ll assume your domainname is already configured in Cloudflare. We will first need your domainnames Zone ID which we will set in the config.
pulumi config set zoneId xxxxxxxxxxxxxxxxxxxxx --secret
pulumi config set cloudflare:email [email protected]
pulumi config set cloudflare:apiKey xxxxxxxxxxxxxxxxxxxxx --secret
Notice that I set the Zone Id as a secret, while it is not secret, I do not want to expose it in the public GIT repo for this post.
We will start adding a namespace, ingress controller and link the domainname to it. At the bottom of the index.ts file, add the following.
// Export the clusters' kubeconfig.
export const kubeconfig = cluster.kubeconfig;

// Create a k8s provider
const provider = new k8s.Provider('k8s', { kubeconfig });

// Setup a namespace

new k8s.core.v1.Namespace(`${name}-namespace`, { metadata: { name } }, { provider });

// Deploy an ingress controller into it

const nginxIngress = new k8s.helm.v3.Chart(
  `${name}-ingress`,
  {
    chart: 'ingress-nginx',
    version: '3.15.2',
    fetchOpts: {
      repo: 'https://kubernetes.github.io/ingress-nginx',
    },
    namespace: name,
    values: {
      controller: {
        scope: {
          enabled: true,
        },
        replicaCount: 2,
        metrics: {
          enabled: true,
        },
        admissionWebhooks: {
          enabled: false,
        },
      },
    },
  },
  {
    provider,
    ignoreChanges: ['status', 'metadata'],
  }
);

// Fetch the ingress URL from the service

const controllerService = nginxIngress.getResource('v1/Service', name, `${name}-ingress-ingress-nginx-controller`);

const ingressUrl = controllerService.status.apply((status) => status.loadBalancer.ingress[0].hostname);

// Get access to the config
const config = new pulumi.Config();
const awsConfig = new pulumi.Config('aws');

// Create a domainname for this ingress using Cloudflare
new cloudflare.Record(`${name}-dns`, {
  name: `charts`,
  zoneId: config.requireSecret('zoneId'),
  type: 'CNAME',
  value: ingressUrl,
  proxied: true,
});
This will
- create a k8s provider, this provider is similar to setting up your kubeconfig on your computer to execute commands on the cluster;
- setup a namespace to deploy all the resources in;
- deploy the ingress-nginx ingress controller into that namespace from the official helm chart repository;
- when it it deployed, we will fetch the ingress URL from the service, on AWS you get a hostname, on EKS/AKS an IP address;
- and finally we create an CNAME record in Cloudflare for charts.vanderveer.be to the hostname of our ingress ELB.
Now we will update our infrastructure by running pulumi up again.
Deploying ChartMuseum on our cluster⌗
We want to keep our charts private, where chartmuseum has several options, we will go for basic authentication. We will define the values for this in the config.
pulumi config set chartmuseumUser chartmuseum
pulumi config set chartmuseumPass random --secret
At the bottom of the index.ts file, let’s add the code to create the S3 bucket and deploy the helmchart for chartmuseum.
// Create the S3 bucket to store the charts
const bucket = new aws.s3.Bucket(`${name}-bucket`);

// Deploy Chartmuseum
new k8s.helm.v3.Chart(
  `chartmuseum`,
  {
    chart: 'chartmuseum',
    version: '2.15.0',
    fetchOpts: {
      repo: 'https://chartmuseum.github.io/charts',
    },
    namespace: name,
    values: {
      ingress: {
        enabled: true,
        annotations: {
          'kubernetes.io/ingress.class': 'nginx',
          'nginx.ingress.kubernetes.io/proxy-body-size': '100m',
          'nginx.ingress.kubernetes.io/enable-cors': 'true',
          'nginx.ingress.kubernetes.io/cors-allow-headers':
            'DNT,X-CustomHeader,Keep-Alive,User-Agent,X-Requested-With,If-Modified-Since,Cache-Control,Content-Type,Authorization,X-Apollo-Tracing',
        },
        hosts: [
          {
            name: 'charts.vanderveer.be',
            path: '/',
          },
        ],
      },
      env: {
        open: {
          STORAGE: 'amazon',
          STORAGE_AMAZON_BUCKET: bucket.bucket.apply((bucket) => bucket),
          STORAGE_AMAZON_REGION: awsConfig.require('region'),
          DEBUG: true,
          DISABLE_API: false,
          ALLOW_OVERWRITE: true,
          AUTH_ANONYMOUS_GET: true,
          DEPTH: 1,
        },
        secret: {
          AWS_ACCESS_KEY_ID: awsConfig.requireSecret('accessKey'),
          AWS_SECRET_ACCESS_KEY: awsConfig.requireSecret('secretKey'),
          BASIC_AUTH_USER: config.require('chartmuseumUser'),
          BASIC_AUTH_PASS: config.requireSecret('chartmuseumPass'),
        },
      },
    },
  },
  { provider }
);
Take notice of the DEPTH environment variable. Some of the repositories we want to mirror later on have naming conflicts for their charts. By adding 1 folder, we can use https://charts.vanderveer.be/mirror1 and /mirror2 to store the different mirrors.
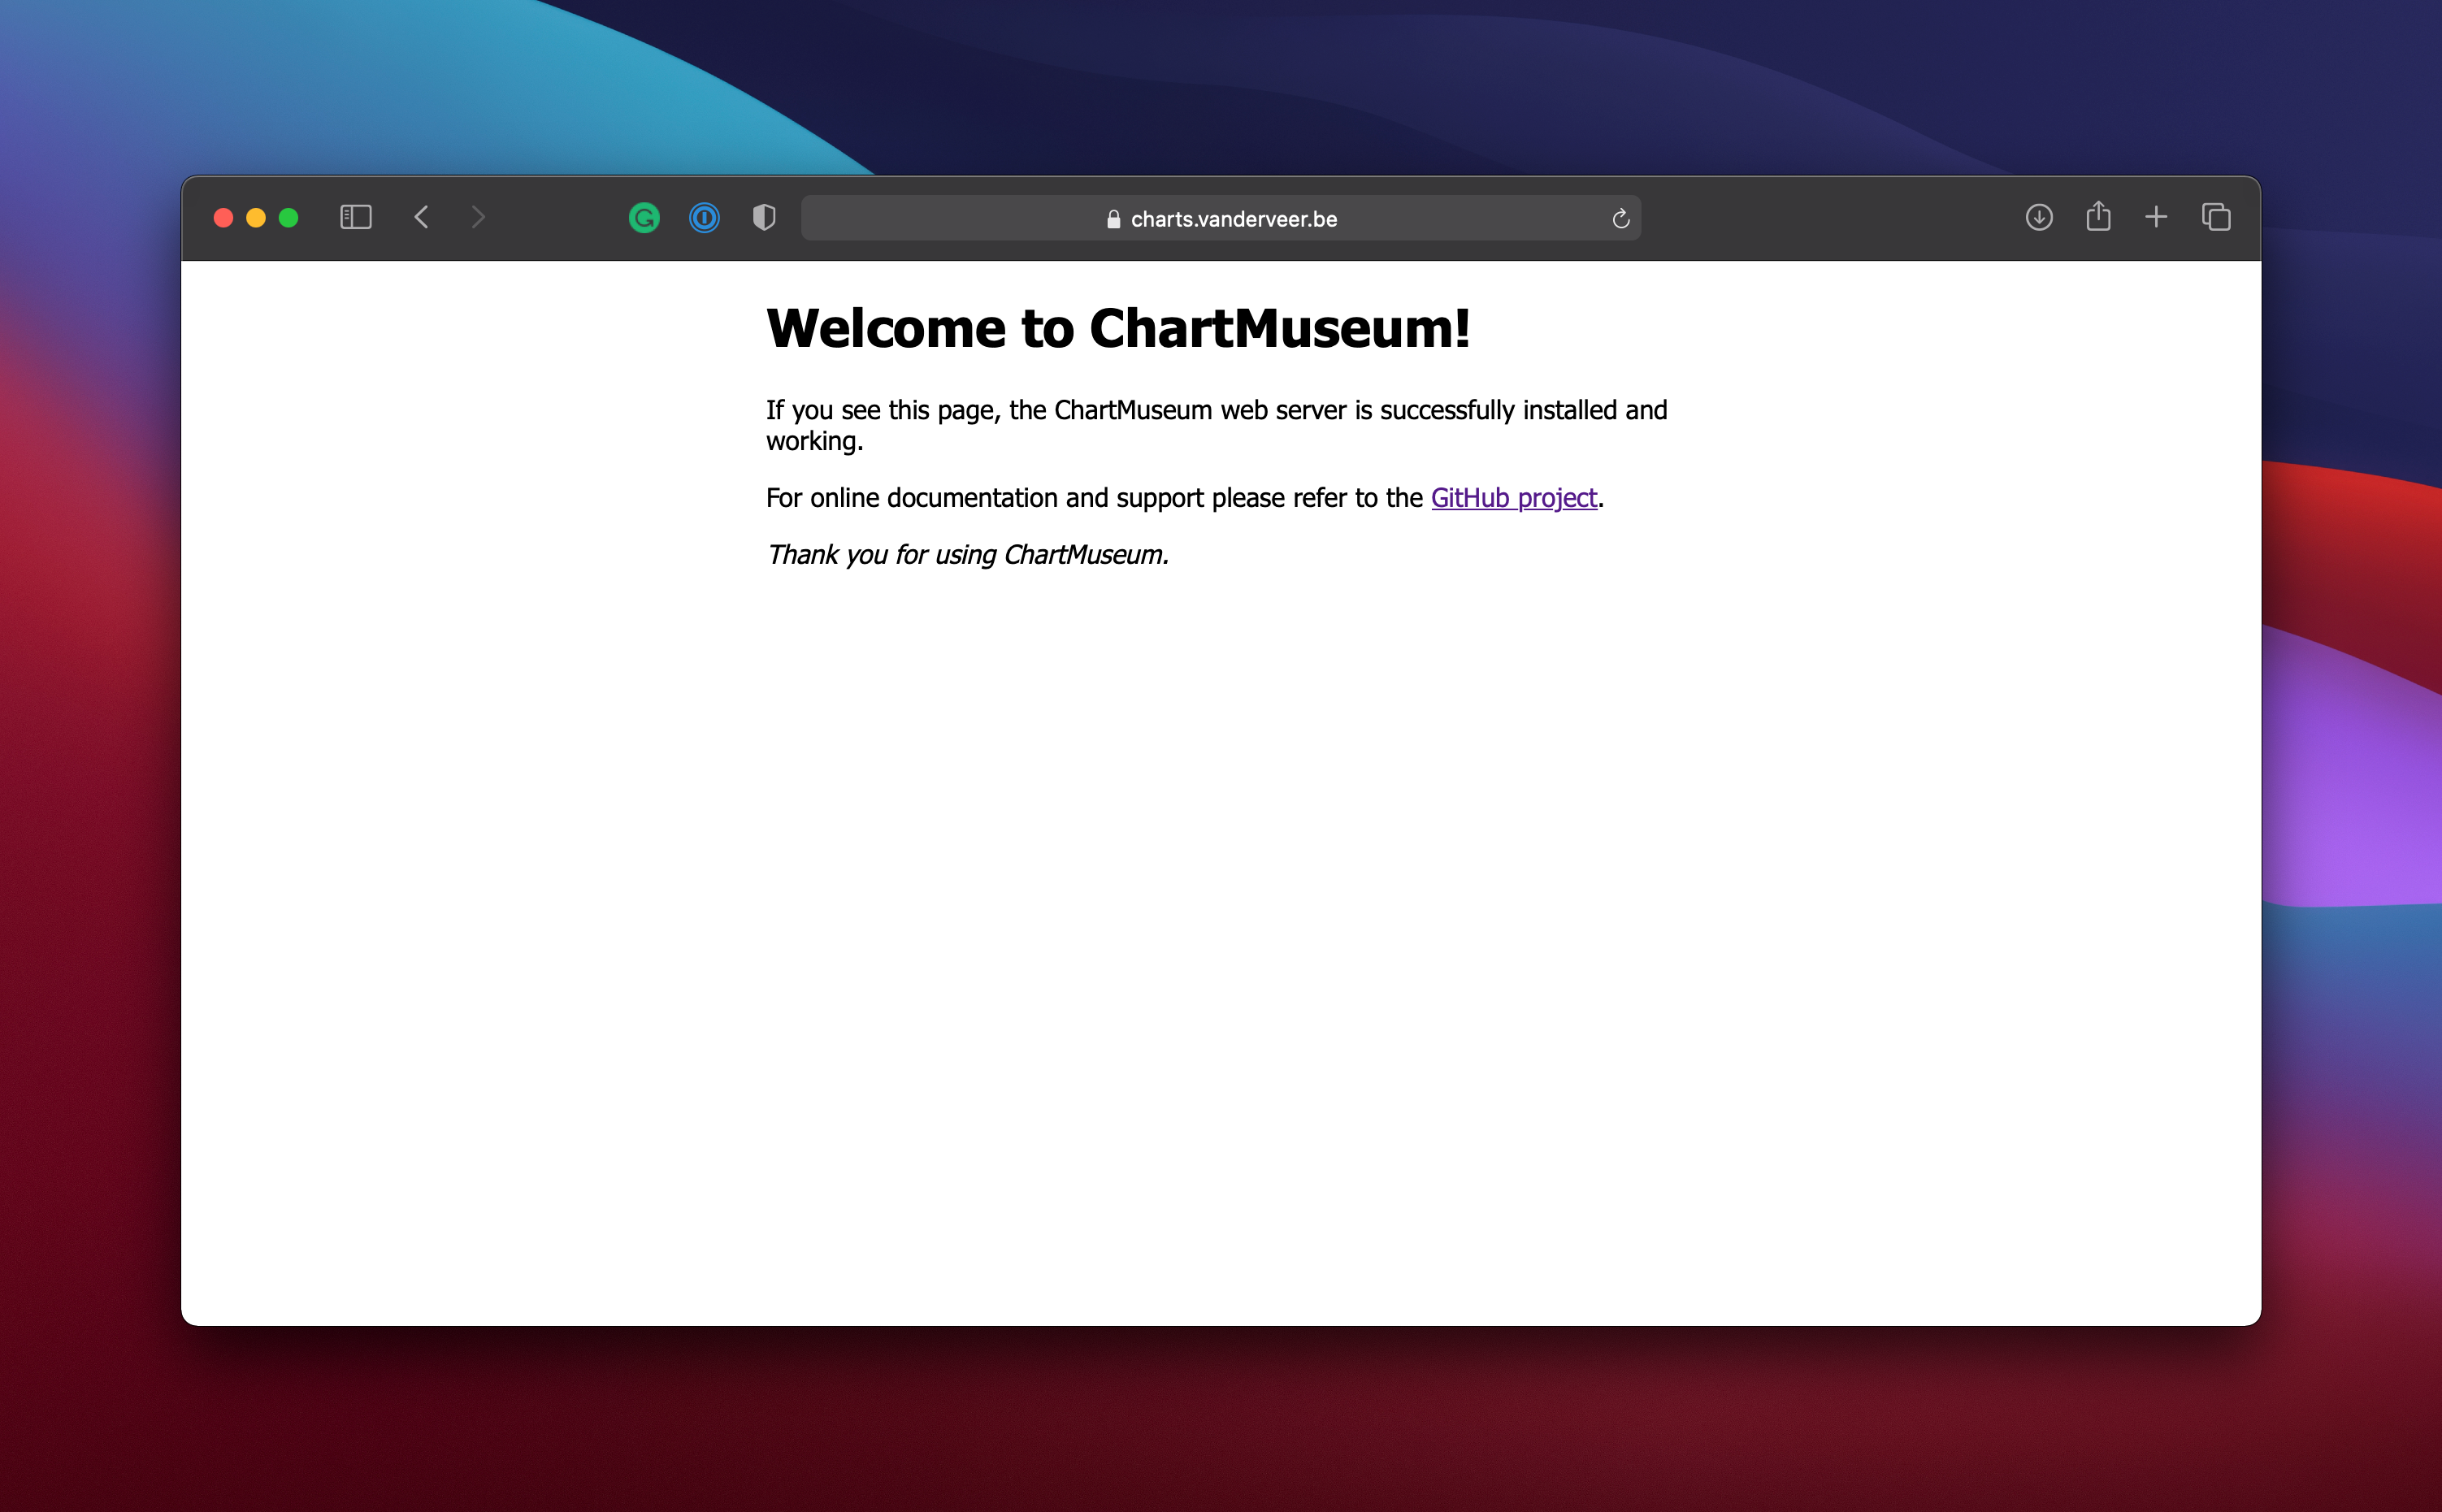
After it deploys, you will the default chartmuseum homepage when you browse to your URL.
Creating your own charts⌗
Now Chartmuseum is installed, we will start a on our own helm charts. Create folder named charts. (can be anything, but for the sake of this tutorial it will help 😀) Inside, we will create an example chart. How this works or what you can do with Helm charts is beyond the purview of this tutorial.
mkdir -p charts
cd charts
helm create example
In the chart, there is a file called Chart.yaml in which two fields are important. The name, and the version.
apiVersion: v2
name: example
description: A Helm chart for Kubernetes

# A chart can be either an 'application' or a 'library' chart.
#
# Application charts are a collection of templates that can be packaged into versioned archives
# to be deployed.
#
# Library charts provide useful utilities or functions for the chart developer. They're included as
# a dependency of application charts to inject those utilities and functions into the rendering
# pipeline. Library charts do not define any templates and therefore cannot be deployed.
type: application

# This is the chart version. This version number should be incremented each time you make changes
# to the chart and its templates, including the app version.
# Versions are expected to follow Semantic Versioning (https://semver.org/)
version: 0.1.0

# This is the version number of the application being deployed. This version number should be
# incremented each time you make changes to the application. Versions are not expected to
# follow Semantic Versioning. They should reflect the version the application is using.
# It is recommended to use it with quotes.
appVersion: "1.16.0"
Similar to the previous example, we will be installing the chart as follows, where the name and the version will be the ones from the Chart.yaml file.
chart: 'chartmuseum',                           --> chart: 'example',
version: '2.15.0',                              --> version: '0.1.0',
fetchOpts: {
  repo: 'https://chartmuseum.github.io/charts', --> repo: 'https://charts.vanderveer.be/vanderveer',
},
Publish your charts to ChartMuseum via Github Actions⌗
We will package the chaart using a Github Actions workflow, let’s set that up.
mkdir -p .github/workflows
Inside create a workflow file named branch.yml and put the following code in there. Before you push this to github, create the HELM_USERNAME and HELM_PASSWORD secrets in your repository, use the values we used for chartmuseumPass and chartmuseumUser above..
name: Release the helm charts
on:
push:
branches:
- main
jobs:
charts:
runs-on: ubuntu-latest
steps:
- name: Checkout
uses: actions/checkout@v2
- name: Install Helm
uses: azure/setup-helm@v1
- name: Install Helm Push
run: |
helm plugin install https://github.com/chartmuseum/helm-push.git
- name: Configure chartmuseum repo
run: |
helm repo add vanderveer https://${{ secrets.HELM_USERNAME }}:${{ secrets.HELM_PASSWORD }}@charts.vanderveer.be/vanderveer
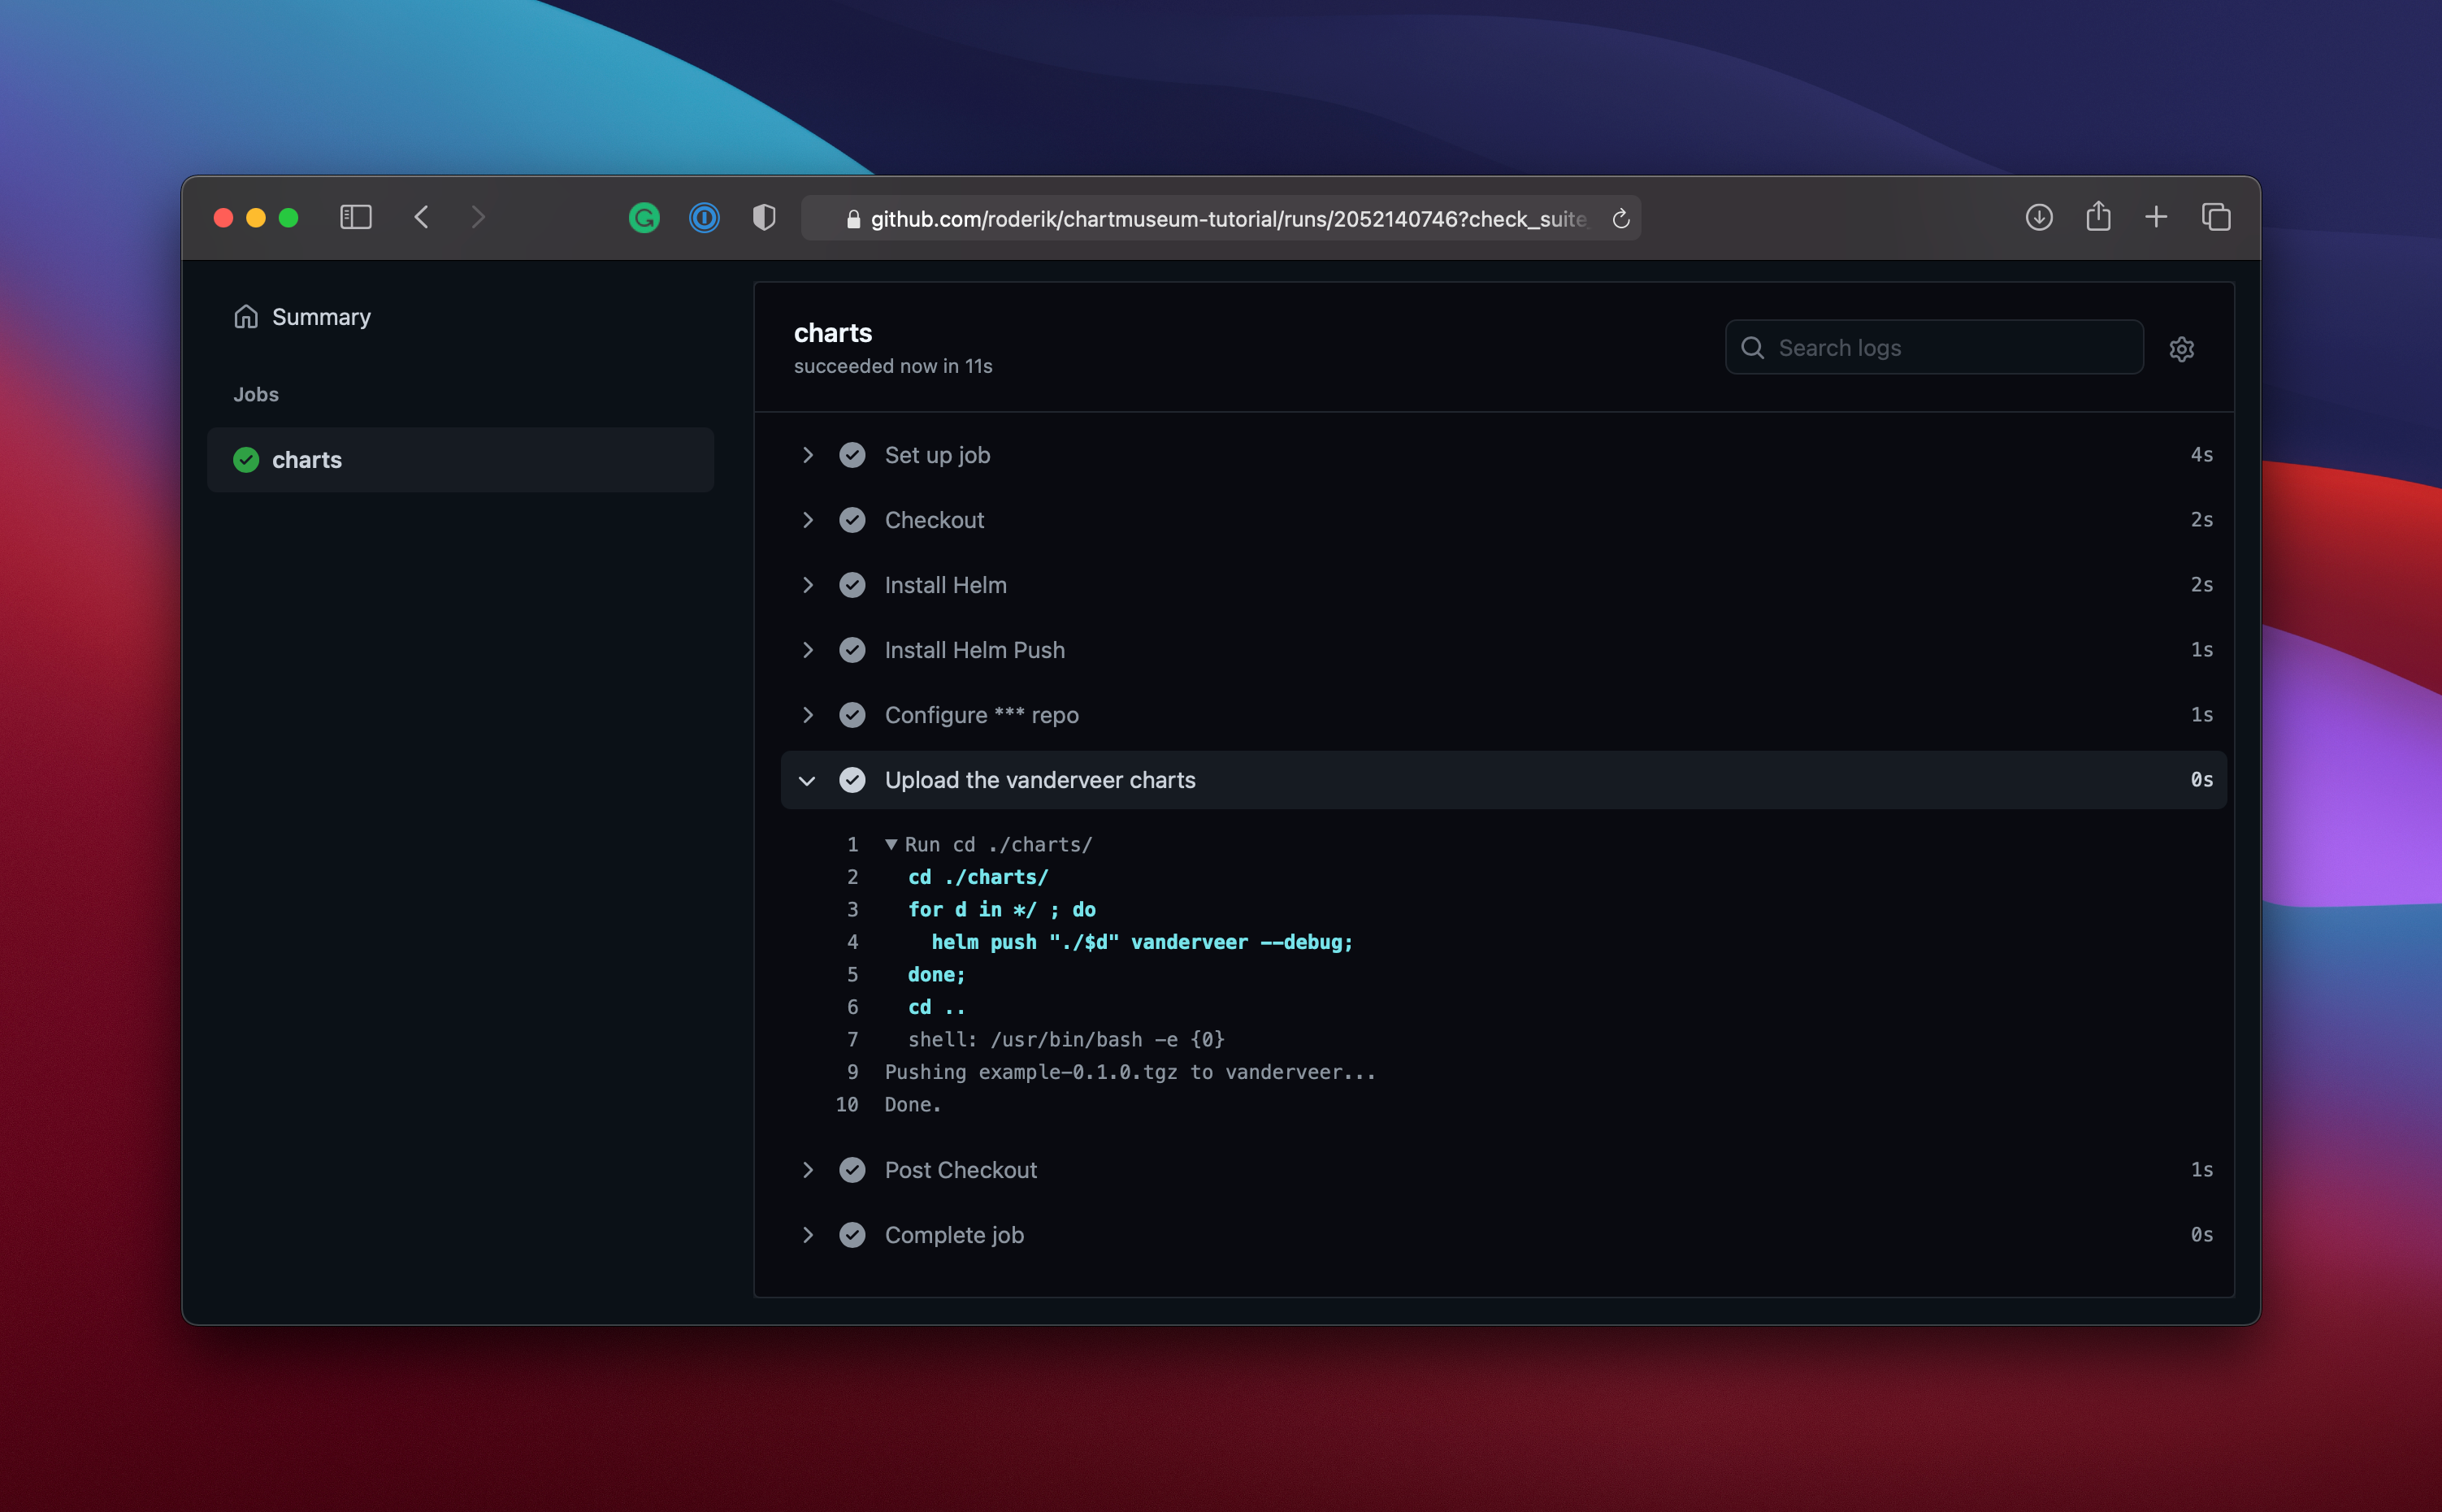
- name: Upload the vanderveer charts
run: |
cd ./charts/
for d in */ ; do
helm push "./$d" vanderveer --debug;
done;
cd ..
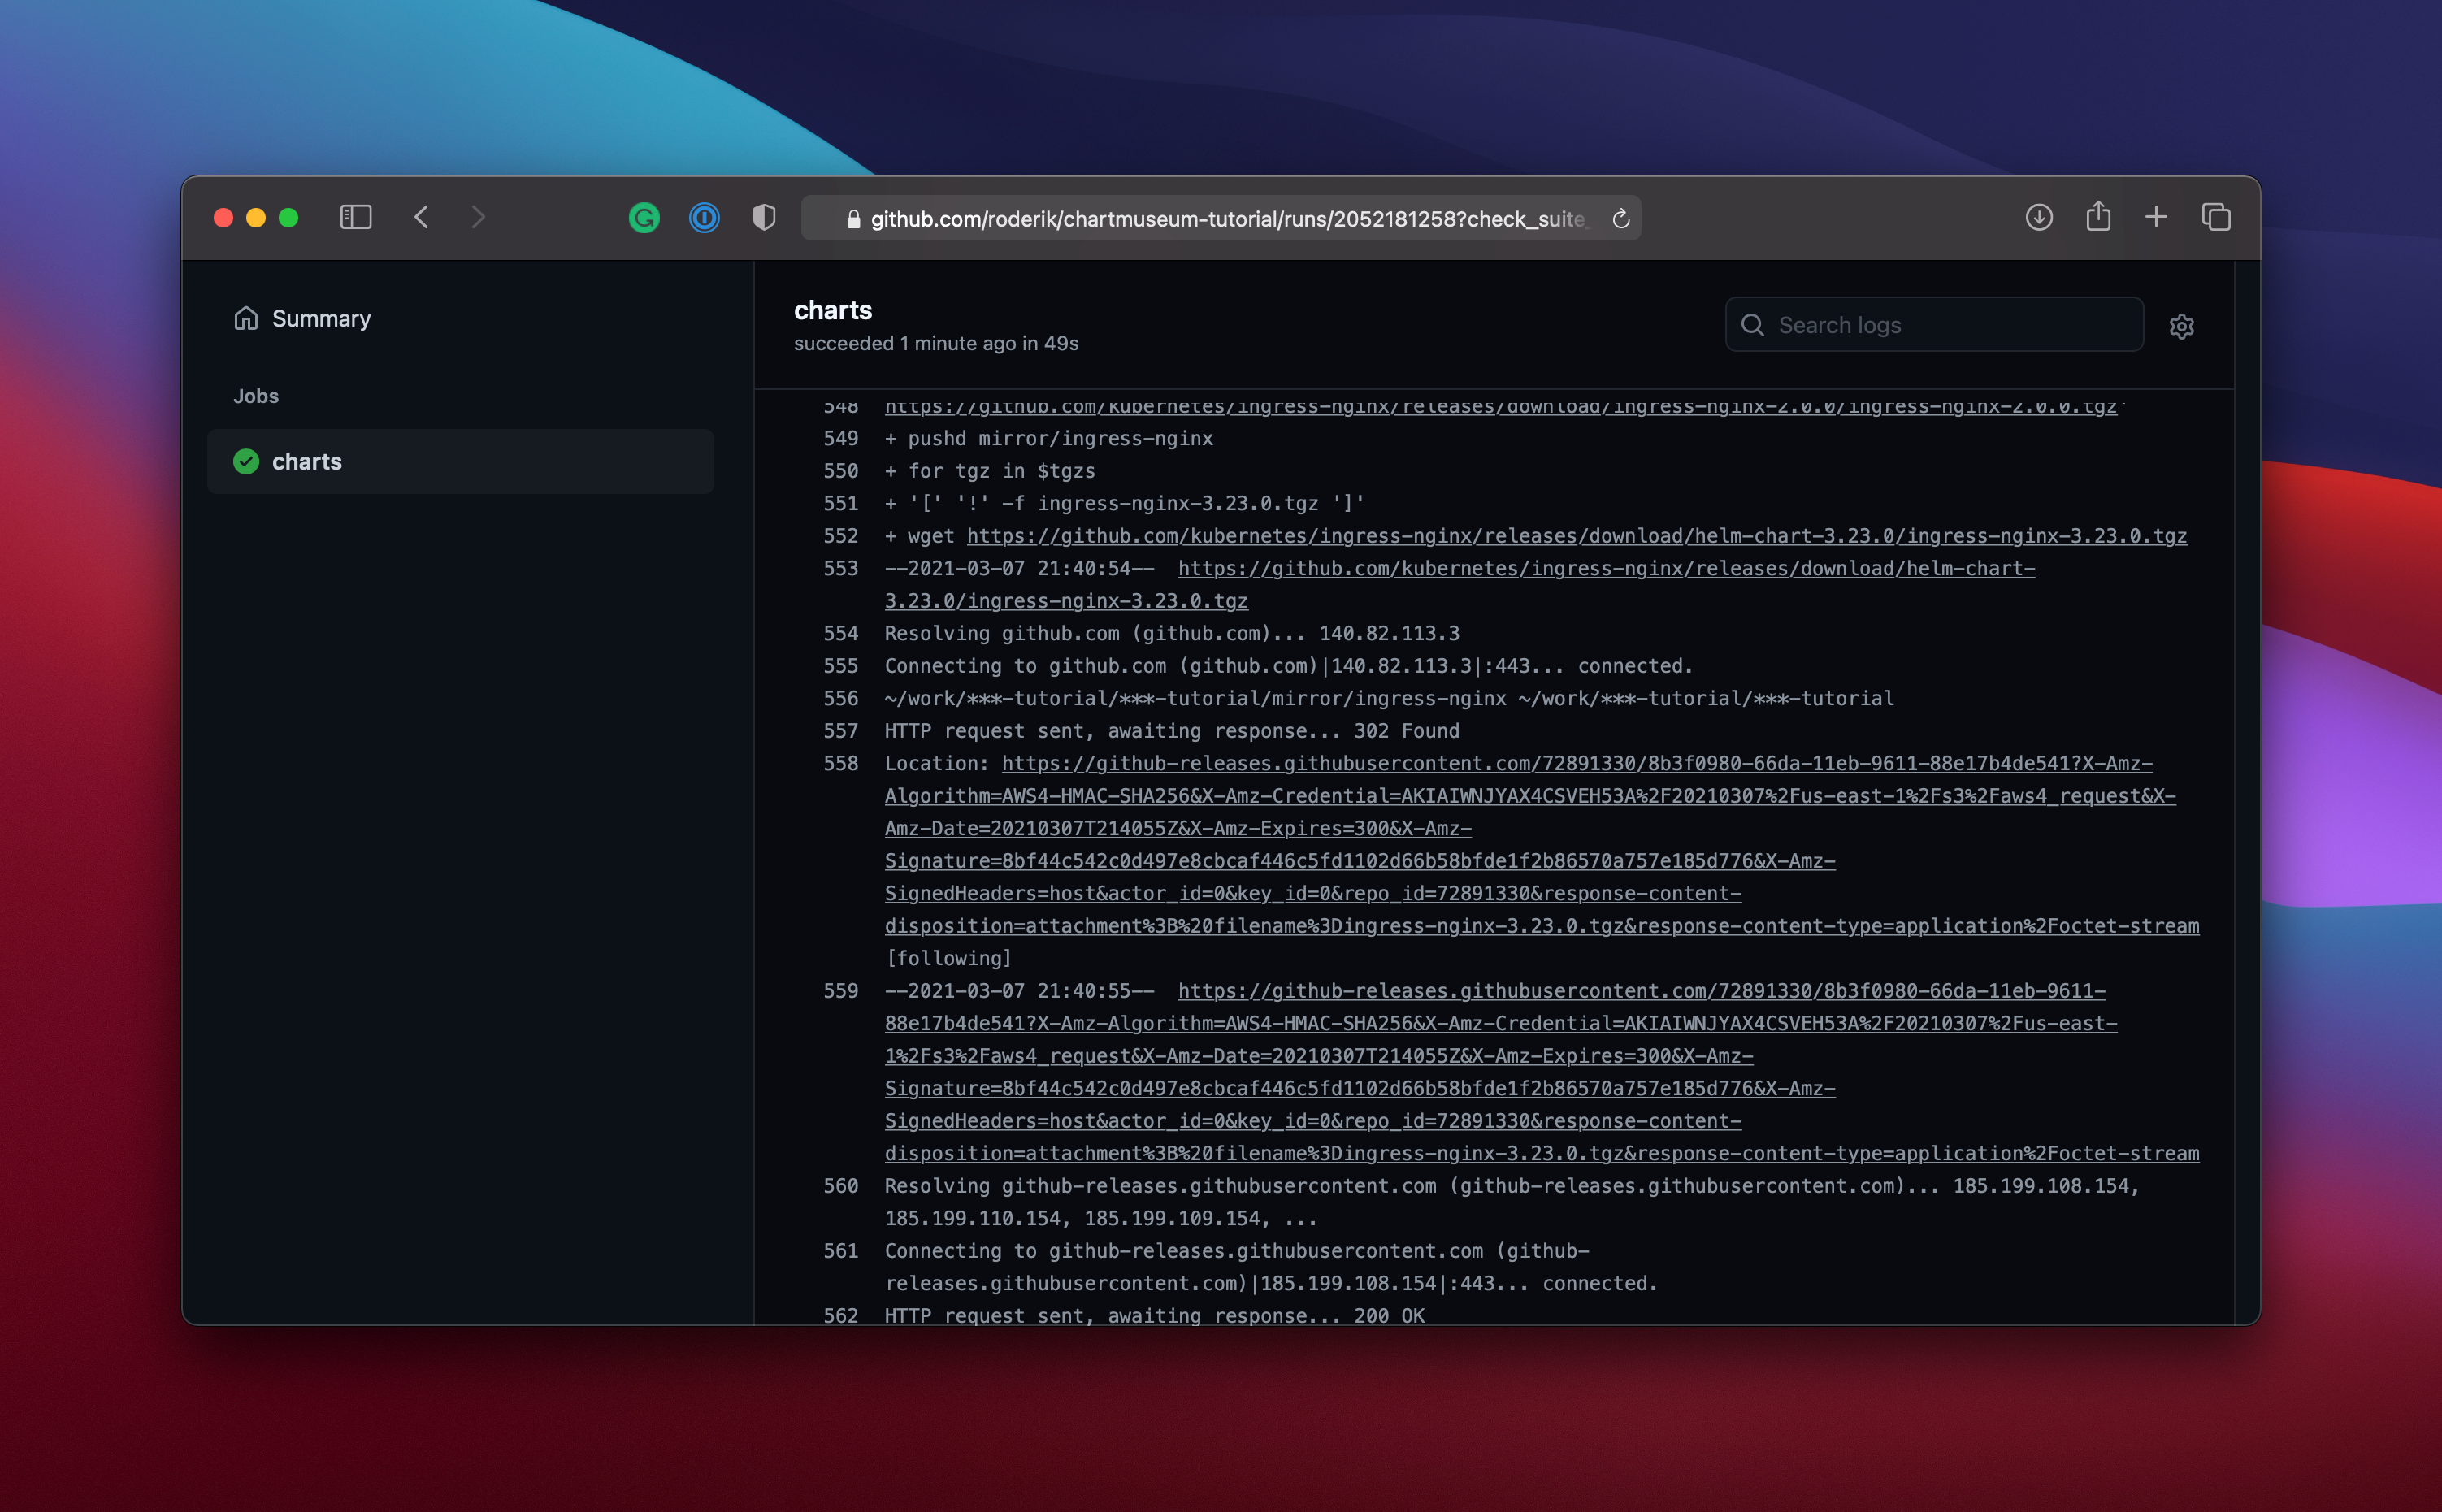
Push this to the GitHub repository and take a look at your actions log.
Checking the YAML file at https://charts.vanderveer.be/vanderveer/index.yaml you should see something like this:
apiVersion: v1
entries:
  example:
  - apiVersion: v2
    appVersion: 1.16.0
    created: "2021-03-07T21:27:16Z"
    description: A Helm chart for Kubernetes
    digest: edc5dad40ad631d5a5dcb008ac0b0699c72fc7aa8fc461506ed3c2422cddc15e
    name: example
    type: application
    urls:
    - charts/example-0.1.0.tgz
    version: 0.1.0
generated: "2021-03-07T21:29:13Z"
serverInfo: {}
Mirroring other chart repositories⌗
Moving on to the mirroring part. We used charts from https://kubernetes.github.io/ingress-nginx and https://chartmuseum.github.io/charts, and we want to make sure they never dissapear because we depend on them.
Create a folder called scripts and put this into mirror.sh inside that folder. Make sure to make the file executable.
mkdir -p scripts
vim scripts/mirror.sh
chmod a+x scripts/mirror.sh
At the bottom of the file we put the repositories we want to mirror.
#!/bin/bash -ex

DIR="$( cd "$( dirname "${BASH_SOURCE[0]}" )" && pwd )"
cd $DIR/../

trap "rm -f index.yaml" EXIT

get_all_tgzs() {
    mkdir -p mirror/$1
    helm repo add $1 https://${HELM_USERNAME}:${HELM_PASSWORD}@charts.vanderveer.be/$1
    local repo_url="$2"
    rm -f index.yaml
    wget $repo_url/index.yaml
    tgzs="$(ruby -ryaml -e "YAML.load_file('index.yaml')['entries'].each do |k,e|;for c in e;puts c['urls'][0];end;end")"

    pushd mirror/$1
    for tgz in $tgzs; do
        if [ ! -f "${tgz##*/}" ]; then
            wget $tgz
            helm push "${tgz##*/}" $1 --debug;
        fi
    done
    popd
}

get_all_tgzs ingress-nginx https://kubernetes.github.io/ingress-nginx
get_all_tgzs chartmuseum https://chartmuseum.github.io/charts
This script will download all charts and versions of the charts, and push them to our own repository under the foldername we set in the first parameter of get_all_tgzs.
We add the following to the branch.yml file for our githbu actions at the bottom. Notice we use a caching step in here. Some of these repositories are HUGE (e.g. bitnami, takes over an hour to mirror) and we do not want to do this every time for every chart. So by caching the downloads and checking on them in the script, we can seriously speed up this process on the second run.
- name: Get Date
  id: get-date
  run: |
        echo "::set-output name=date::$(/bin/date -u "+%Y%m%d%H%m%s")"
  shell: bash

- name: Cache mirror
  uses: actions/cache@v2
  with:
    path: |
            mirror
    key: ${{ runner.os }}-chartmuseum-${{ steps.get-date.outputs.date }}
    restore-keys: |
            ${{ runner.os }}-chartmuseum
- name: Mirror charts
  run: |
        ./scripts/mirror.sh
  env:
    HELM_USERNAME: ${{ secrets.HELM_USERNAME }}
    HELM_PASSWORD: ${{ secrets.HELM_PASSWORD }}
Commit this and push it to GitHub. The action will take about 40 seconds since these two repositories are not very large.
Check out the index.yaml file to see if it worked:
curl -i https://charts.vanderveer.be/ingress-nginx/index.yaml
Maintaining the infrastructure via Github Actions⌗
Now we only need to circle back and use them ourselves. Move the const config = new pulumi.Config(); declaration to the top and change the fetchOpts of both charts to:
fetchOpts: {
  repo: config
    .requireSecret('chartmuseumPass')
    .apply(
      (password) => `https://${config.require('chartmuseumUser')}:${password}@charts.vanderveer.be/ingress-nginx`
    ),
},

fetchOpts: {
  repo: config
    .requireSecret('chartmuseumPass')
    .apply(
      (password) => `https://${config.require('chartmuseumUser')}:${password}@charts.vanderveer.be/chartmuseum`
    ),
},
Running pulumi up again should result in no changes, because the charts are the same, only the storage location is different.
As a last task, we do not want to run pulumi up by hand anymore, let’s add this to the GitHub actions as well. Create an AWS_ACCESS_KEY_ID, AWS_REGION, AWS_SECRET_ACCESS_KEY and PULUMI_ACCESS_TOKEN secret in Github first to match the values we put in the Pulumi config and your Pulumi account.
Add the following at the end of branch.yml.
infra:
  runs-on: ubuntu-latest
  needs: charts
  steps:
    - name: Checkout
      uses: actions/checkout@v2

    - name: Configure AWS Credentials
      uses: aws-actions/configure-aws-credentials@v1
      with:
        aws-access-key-id: ${{ secrets.AWS_ACCESS_KEY_ID }}
        aws-region: ${{ secrets.AWS_REGION }}
        aws-secret-access-key: ${{ secrets.AWS_SECRET_ACCESS_KEY }}

    - name: Use Node.js 14
      uses: actions/setup-node@v1
      with:
        node-version: 14

    - name: Install pulumi
      uses: pulumi/[email protected]

    - run: npm install

    - uses: pulumi/actions@v2
      env:
        PULUMI_ACCESS_TOKEN: ${{ secrets.PULUMI_ACCESS_TOKEN }}
      with:
        command: up
        stack-name: chartmuseum
And commit and push to GitHub. Wait for it to complete and you are done…